|
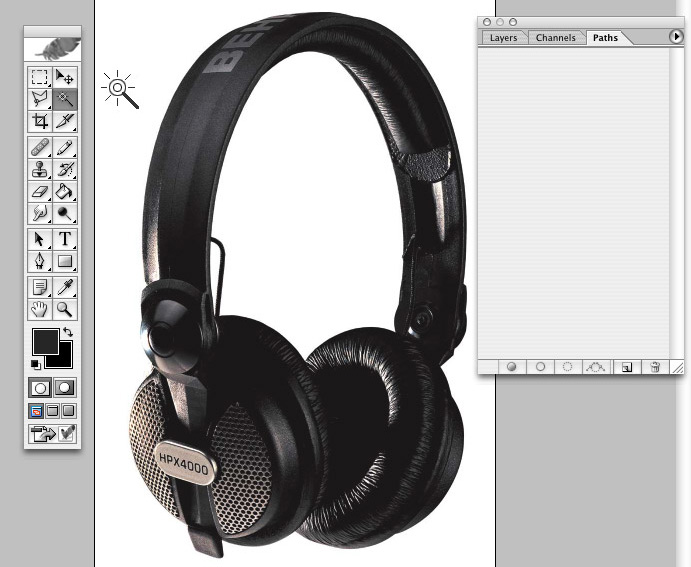
Step one: Using the magic wand selection tool, select the negative space around the headphones.
Use the shift key to select all of the big white spaces.
|
|
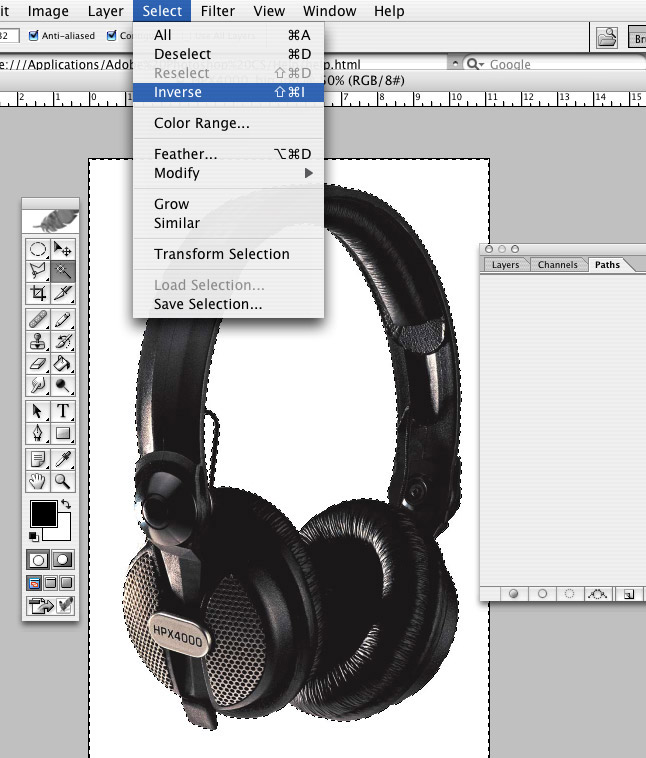
Step two: After all the negative space is selected, Select the Inverse to select only the headphones.
|
|
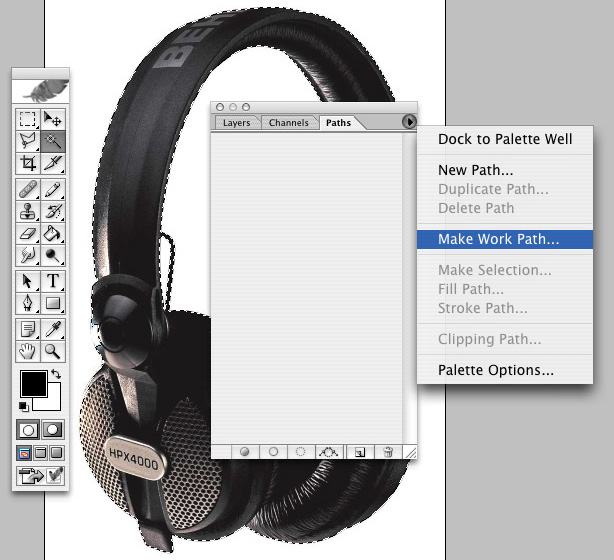
Step three: After the inverse image is selected, select Make Work Path from the panel menu.
|
|
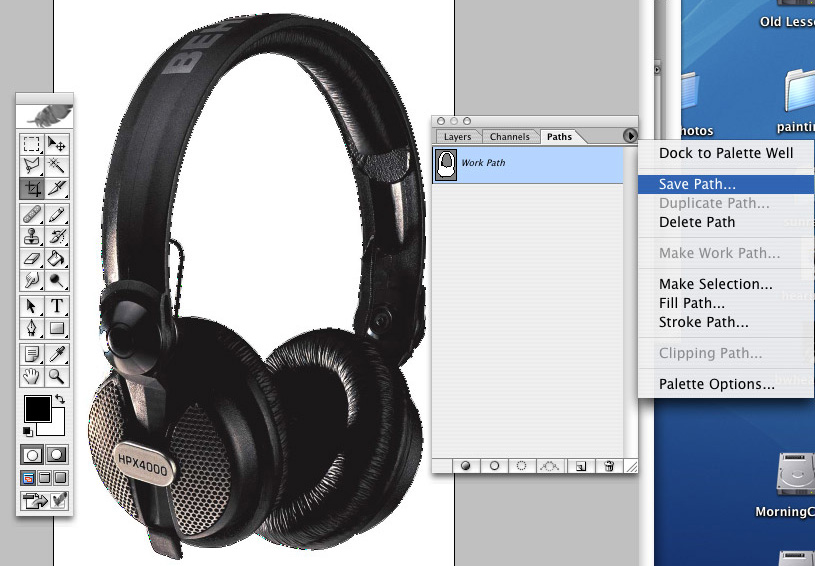
Step four: After the work path is made, save it as a Path. It will default name to "Path 1."
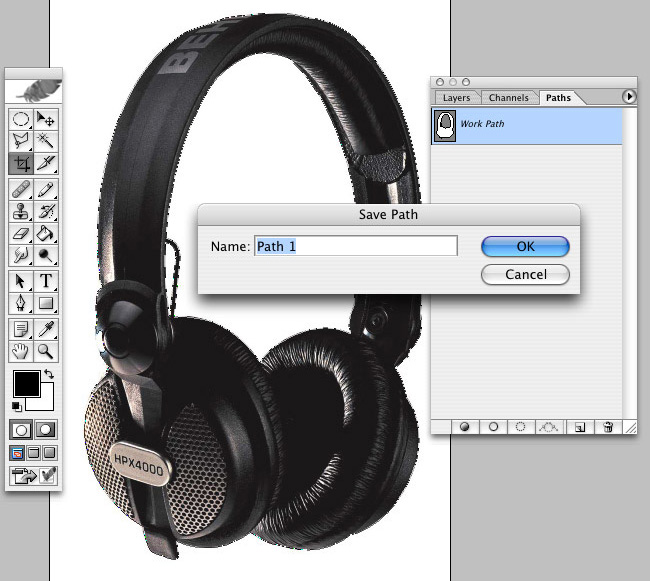
|
|
Step five: Now, this work path (Path 1) will need to be saved as a clipping path. Don't enter anything into the "flatness" textbox.
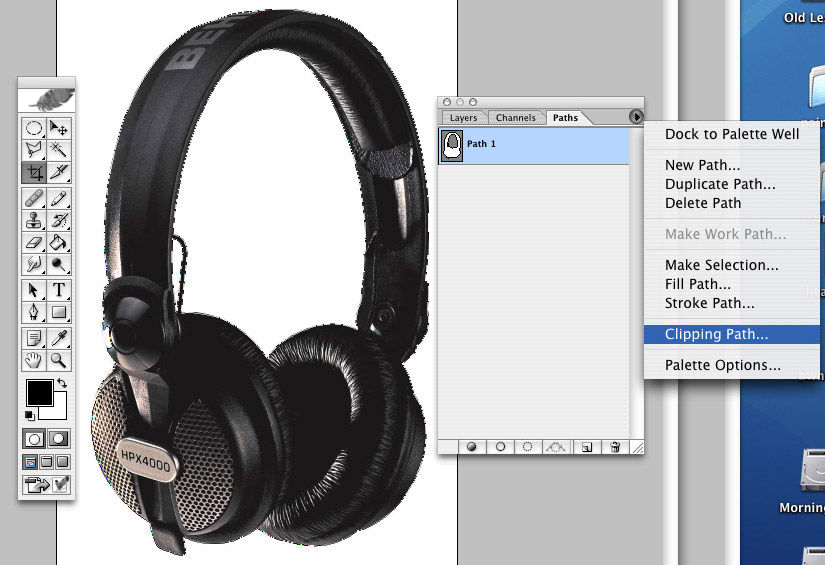
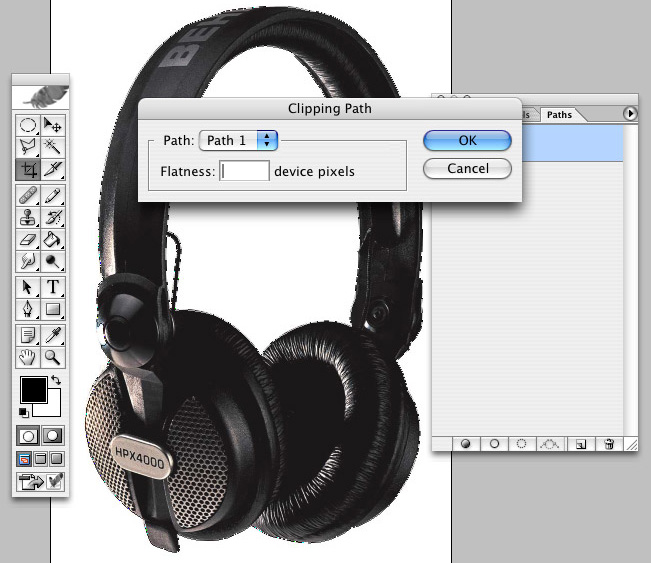
|
|
Step six: Now, this work path (Path 1) is a clipping path. You can tell by the outline around "Path 1".
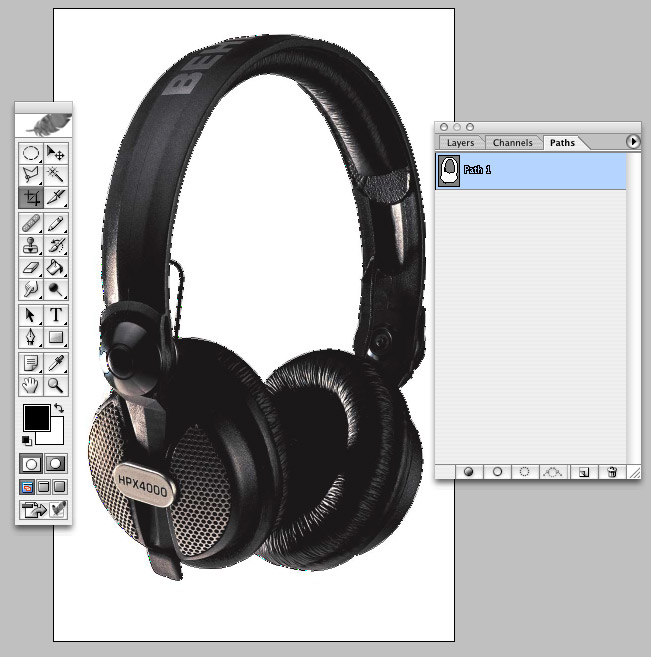
|